One option you have to throw the open stone is to employ what’s called the, “Glide” technique. When it comes to the stone throw, this is a more simple and straightforward approach than the “Modified South African,” or “Full Spin.” But, don’t let this fool you; the glide is plenty complex and can merit some huge, huge throws. It’s a very worthy technique; here are a few reasons I like the glide:
1. It’s a much more consistent movement, which is especially helpful when you consider how inconsistent the stone will be at each games. You may be throwing a heavier blockish stone at one games but then the next one you throw a large, more spherical stone.
2. Grass. When it comes to turning, it doesn’t get much more difficult than cleats on grass. Using the glide is a great option when the need to turn your foot is much less reduced to the other movements.
3. Less to think about. If you don’t already know, getting inside your own head gets far too easy in this sport. The less you can think during gametime, the better, and in many cases the glide allows you to buckle down mentally and really go after the throw.
So, how’s the glide work? Of all the events, this is the only one that truly transfers over from track and field. With that said, there is a plethora of resources for any glide work you want to do. Simply take a peek on YouTube and you’ll get a lot of insight. But, I think there’s a few things that need to be stressed in relation to the Highland Games (i.e. throwing on grass).
Let’s break it down:
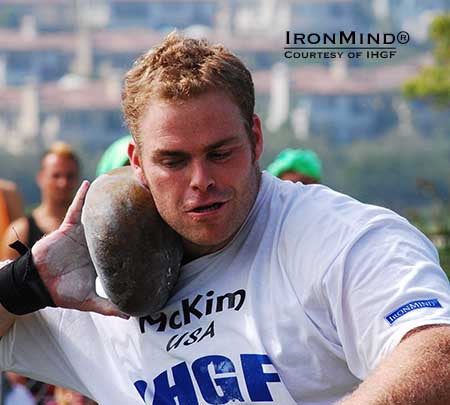
Start with the stone in your hand like we’ve previously discussed. Now, place the stone on your neck, with your elbow up. Before we go any further, I want to note that can place this stone as far back on your neck as you’d like, but you’ll notice that most all of the world’s top gliders hold the stone (and shot) lower on their necks and closer to just below where the jawline curves. I suggest you play with this and find your comfort zone – I believe a lower stone placement with a slightly more dropped elbow is a better hold for the glide in the long run.
Next, lean over your right foot with your right knee slightly bent and a good bend at the waist. Many coaches will use a “drop the implement” cue on this where your body should be bent so that if you were to drop the stone from your hands, it would drop right onto your right foot. I’m not particularly concerned on the flatness of your back, but know that you shouldn’t be standing more straight up.
From here, your left leg will help you travel across the trig box. Keep your left arm relaxed, long and loose. You will simultaneously kick back with your left leg while you push off the ground with your right leg. The hard part of this movement is that you’ll actually be pushing off your heel and not the ball of your foot. Yep, the heel. This goes against most all of your natural tendencies as virtually all athletic movement is predicated from the ball of the foot; not the case here.
Push off that heel as you reach with that left leg. The left leg will then land in a slightly open position, with the foot being a “heel to toe” relationship with the right foot. This means that your left toe will be inline with the heel of your right foot. But, I’m more concerned with what your upper body is doing and how your right foot is working.
The upper body should land “wrapped” and over your right foot. Meaning, don’t let your left shoulder open up and your right side follow; keep that right arm and body wrapped up. You should land in virtually the same neutral position as you started with, as you’ll want to get as long of a push on that stone as you possibly can. Many times, a visual will help. Maybe you place a bag, shoe, chalk, something for your eyes to catch when you land in this position. A most certain way to limit distance on this throw is to lose that visual and “open up” with your upper body and head. Keep that upper body back!
When your right foot lands somewhere close to the middle of the box, you’ll have to turn it to finish your throw. Turning the right foot initiates the hips into the throw, giving you that slingshot finish on the stone. (Foot turns, hips fire, chest gets big, shoulder punches forward, arm and hand follows, left arm blocks hard, right fingers flick the stone, feet exchange, you yell and scream, new PR … at least that’s how it’s supposed to go). To help with that right foot turn, I coach throwers to “pre-turn” that right foot in the air. So, as it’s traveling to the middle of the box, in the split second it is off the ground, turn that right foot towards the sector. This enables you to speed up your finish and make up for the drag that the grass creates, as opposed to throwing shoes on smooth concrete. Pre-turn that right foot!
Now that you’ve landed at the front of the trig, let’s finish the throw!
Turn that right foot. Keep turning it. From here, your hips will be firing as they extend. The hips will now be facing the center of the sector and your arm and upper body will be following it shortly! Remember that the key to a big throw in the glide is a solid right foot turn, a right hip that absolutely crushes it, and a big, tall push on the stone.
Now that your hip is firing, it’s time to follow it with the shoulder punching into the landing area, followed by the arm and hand. I’ve heard some coaches tell throwers to pretend they are a punching a huge, tall mugger; giving you a cue to get your hand high and punch it up! Regardless of how you want to think of it or process it in your mind, know that your right hand has to be pushing on that stone at about a 45 degree angle. You should be pushing that stone so it lands to the left-center of the landing area. This means you are getting a good push on the stone from your feet to your hands. If you’re losing the stone out to the right, you can probably look back and see where you went wrong, whether it was opening up too early out of the back, not turning your right foot, or even pulling your head down and away from the stone at the finish. I, personally, have this problem and struggle greatly to keep myself wrapped and aggressively applying force to the stone to the left-center of the landing area.
When you throw the stone, the last part of you to be touching it should be your fingers. A big reason why you should tape/wrap your wrist is to allow a great push and “flick” off the fingers. Look at it this way: if you are chucking knuckleball throws with the stone, then you need to fix your flick! Get rotation on that stone!
On the finish, your left arm is incredibly crucial. Your left arm should be thrown out and up away from your body, and then violently thrust to the left side of the body. The “block” as it’s called, is a huge piece of the pie. Think of the “block” like you would slamming on the brakes of a speeding car; your body is thrust to the front of the vehicle. The “block” helps slam that momentum and speed right into that stone as it leaves your hand. Your feet then exchange and you keep your butt on the right side of the trig so you don’t foul!
From there, it’s all in the scream and fist pump for the new PR.
violet
Be careful of people asking for your money or investment platforms promising huge returns. They lure victims into fake programs. I was scammed of 398,450 U S D. While researching on how to recover my funds, I came across several recommendations on Bitcoin Abuse Forum about coinsrecovery organization. I contacted him via (COINSRECOVERYWORLDWIDE AT GMAIL DOT C OM)and he helped me recover my stolen funds. If you’ve also been a victim, don’t hesitate to get in touch with him. The United States Department of Justice estimates that only 15% of victims of financial fraud report the crime because they are embarrassed, feel guilty or think nothing can be done. There are millions of victims of financial fraud every year.
CONTACT INFORMATION]📞 +1(737)368-8915(whatsapp),EMAIL[coinsrecoveryworldwide at gmail dot com]
©️2025 COINSRECOVERYWORLDWIDE
101 N BRAND BLVD.
11TH FLOOR GLENDALE CA 91203.
#investing #financialfreedom #crypto #bitcointrading #investmentstrategy #altcoins #bitcoinnews #investor #bitcoinprice #bitcoinmining #bitcoinexchange #bitcoinwallet #bitcoincommunity #bitcoinmarket #bitcointrader #bitcoinbusiness #bitcoinexpert#BITCOINSRECOVERY #STOLENBITCOINS #FOREX #USDT
Dave allen
I lost my job few months back and there was no way to get income for my family, things was so tough and I couldn’t get anything for my children, not until a met a recommendation on a page writing how Mr Bernie Doran helped a lady in getting a huge amount of profit every 6 working days on trading with his management on the cryptocurrency Market, to be honest I was skeptical at first but I took the risk to take a loan of $500, and I contacted him unbelievable and I was so happy I received a profit of $5,500 with an investment of $500 within 7 days of trading , the most joy is that I can now take care of my family, i am just sharing my testimony on here. I don’t know how to appreciate your good work Mr. Bernie Doran, God will continue to bless you for being a life saver I have no way to appreciate you than to tell people about your good services. He can also help you recover your lost funds, For a perfect investment and good return on investment contact Mr Bernie Doran on Gmail : Berniedoransignals@gmail.com his telegram : IEBINARYFX or his whatsApp + 1 ( 424 ) 285 – 0682
gtnqghtzez
Muchas gracias. ?Como puedo iniciar sesion?
Brian Randell
I have thought about this a lot and the glide will be my go to now.
Daniel McKim
Thank you Andrew!