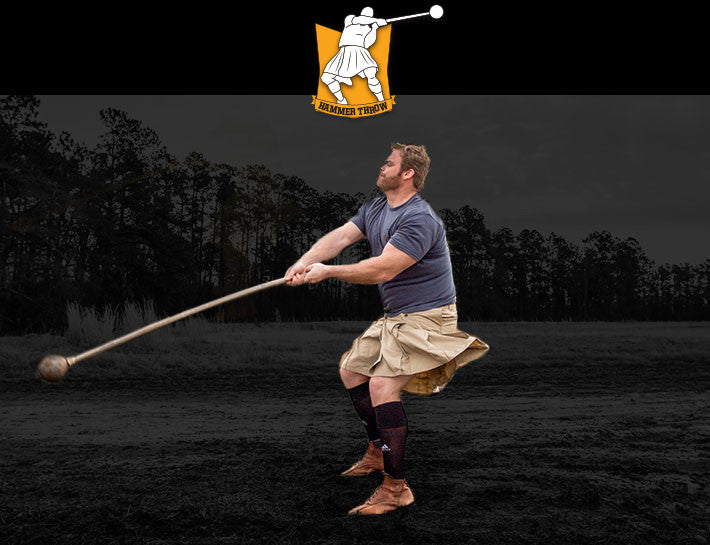
The Scottish hammer can be one of the most complex and intimidating events; in my opinion, it’s second only to the caber. So, how does one even begin to stick their feet in the ground and wind a 16 or 22 lb. ball and handle around their head? If you don’t have your stance right, you might “wind” up in a bad position (see what I did there?). I don’t mean to “hammer” home too many points, but your problem could be your stance.
One of the very initial things is how you set up to throw it, and that’s the aim for today – show me your best hammer stance!
Whether you throw with blades or just in cleats/spikes/shoes/boots, your stance is critical to a big throw. (Side note: if you aren’t throwing in blades yet, do it. Now. Quite fighting it and jump in. You’ll be glad you did).
The natural tendency, especially when you have 12 inch blades protruding from your footwear, is to gather a rather wide stance to try and open the hips. I think some throwers feel if they have a wider stance, they can better shift their weight side to side with winds (that’s a totally different blog for a different day but, in short, don’t try that). How wide?
I feel it’s best to set yourself up with a more narrow, “Olympic” base. Not so much shoulder-width, but more so hip-width. Think of it in terms of squats – you have wide stance, feet pointed out “Powerlifting” stance and then you have a more narrow, feet pointed straight ahead “Olympic” stance. Through the years, I’ve found that a more narrow base works best for generating the power and speed you want from the winds, whether you do one, two or three.
But … the blade holes are already there for me to use!
One of the biggest mistakes novice, and experienced, throwers make in the hammer is depending on the existing “blade holes” their competitors make behind the trig board. You are throwing with a great collection of throwers of various sizes, so why should their “blade holes” be standard size? They’re not! Your kilt isn’t a one-size-fits-all, and neither should your stance be … or your fellow competitor’s for that matter!
Hammer will make ya wanna … JUMP! JUMP!
In practice, find a comfortable feet width; I tell a lot of throwers that this may very well be close to the stance you take to do a vertical jump or broad jump. Some of you either just tried the jump or at least pictured yourself doing it, so, let me ask you this: did you have a stance that resembles a wide or narrow stance? Narrow is right. So, find that width that works for you, and go practice some throws with it! Oh, and replace that picture frame that just spilled to the ground and busted when you jumped.
Toe the line? Or is it, tow the line? Actually, it’s line the toes!
Lastly, don’t forget how your toes are lined up. I’ve never been a big proponent of offsetting the release side foot (the left foot for you right handed throwers). I’ve also heard others coach to stagger your feet; having that release foot about six inches closer to the trig board. Some feel that these two things allow you to open your hips, but I feel differently, especially since you’ll want your power to generate in a more up and down motion as opposed to a side to side shift (again, more on this topic some other time). The reason for a more straight and parallel stance is that the hammer is still an event that requires you to block your finish. Keep your feet pointed straight in front of you.
All in all, it comes down to comfort. My best advice, especially for the beginning thrower, is to start with a more narrow stance (think hip width) and work from there. Now, get out to the field and throw!
Jim Garrick
Thanks Dan. Great advice and tips. How important would you say flexibility is in throwing the hammer? And do you have specific mobility exercises for the hammer throw?